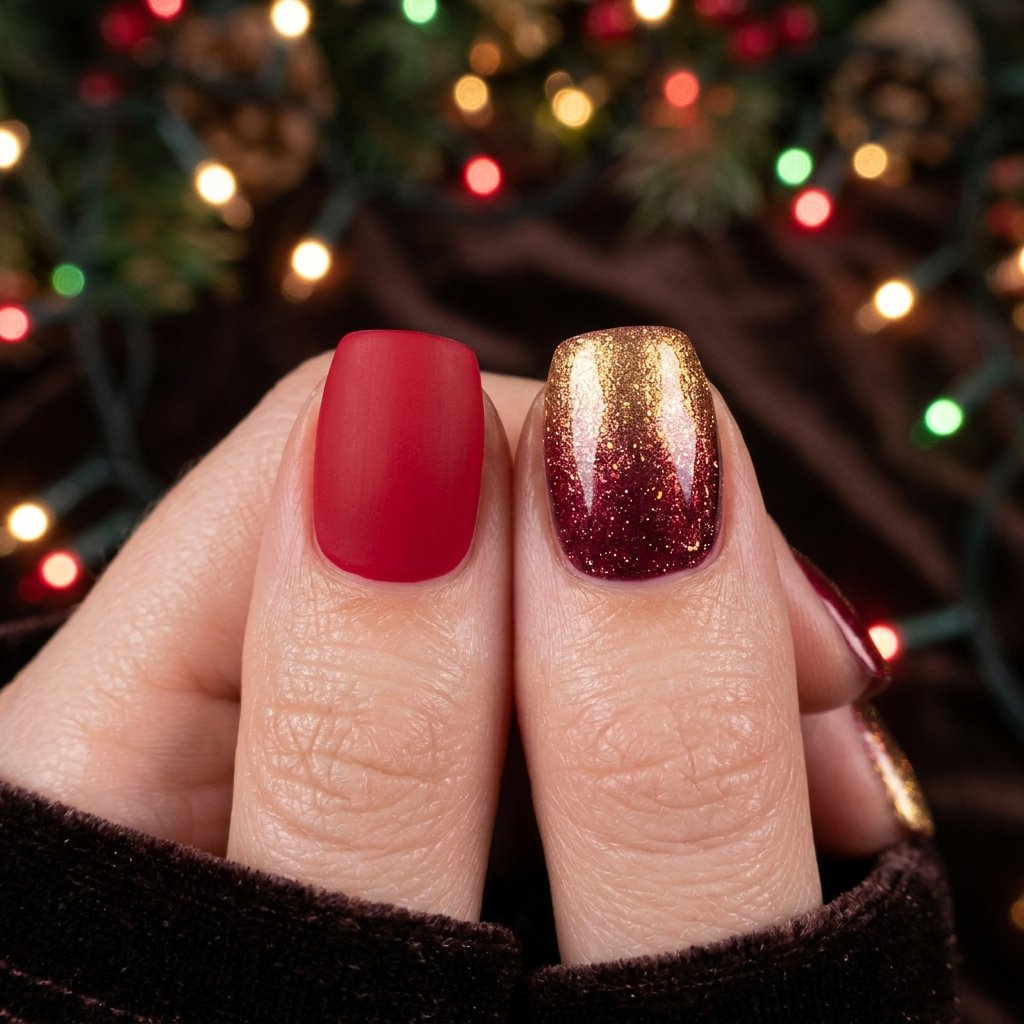
Christmas ombré nails are December’s smartest design move — one manicure that reads festive from across the room and expensive from six inches away.
The gradient does what solid polish cannot: it carries two shades of the season in one look. Burgundy melting into gold. Plum dissolving into silver. Chocolate softening into cream. Every ombré is a tiny sunset of the holiday’s best colors — and every one of them photographs better than a single flat shade.
The best part is the technique. Ombré looks like salon sorcery and builds with a kitchen sponge — three taps, two cleanup swabs, and a design that guests assume cost sixty dollars.
So this guide maps christmas ombré nails by gradient direction — the four ways color can travel across a nail — then hands you ten gradients in December’s best shades. Direction first, colors second, technique last. That is the order the pros work in.
The sponge is in your kitchen already. Let’s go.
Follow our Pinterest boards for daily nail inspiration, and join us on Facebook so you never miss a seasonal design guide.
Why Ombré Wins December (The Two-Shade Advantage)

One structural truth makes gradients the holiday’s smartest choice.
Two colors, half the boredom. Solid nails shine once and stay the same. Ombré shifts with every angle — the light hits different stops on the gradient as the hand moves, which means the manicure never reads static. In December’s five-light-source rooms, that movement is the whole show.
Growth hides in gradients. The ombré’s soft transition is also a camouflage system — regrowth blends into the fade instead of announcing itself against a solid line. Solid red shows a gap in ten days; a burgundy-to-gold gradient hides one for three weeks.
It bridges every holiday. The right gradient starts Thanksgiving-warm and ends New Year’s-bright — burgundy-to-gold carries October’s depth into January’s sparkle without one redo. The season-spanning logic that made our thanksgiving glitter nails guide work applies double to a good gradient.
The Gradient Direction Map (Read This First)

Ombré is geometry before it is color — and four directions cover every design in this guide.
Vertical gradient — color travels from cuticle to tip. The classic; the most common; the direction that elongates short nails.
Reverse gradient — color travels tip to cuticle. The dark-tip version that reads edgier and hides tip wear completely.
Diagonal gradient — color sweeps corner to corner. The asymmetric modern take that adds motion to every hand gesture.
Horizontal fade — color fades side to side across the nail. The rarest direction, and the softest.
Every design below names its direction. Choose the direction that flatters your nail shape first — vertical elongates, reverse hides wear, diagonal adds edge — then pick your colors.
The Sponge Technique (The Whole Skill in 5 Steps)

One method builds every gradient in this guide — and it takes one kitchen sponge.
Step one: paint the base color on all nails and let it dry fully. This is the color the gradient fades INTO.
Step two: paint the second color in a thick stripe onto a makeup sponge — damp, not soaked.
Step three: press the sponge onto the nail tip repeatedly — two to four taps build the blend. The color merges with the base where they meet, and the gradient happens automatically.
Step four: reapply polish to the sponge between every nail — dry sponge means dry streaks.
Step five: clean the edges with a cotton swab dipped in polish remover, then topcoat everything while the blend is fresh. The topcoat melts the sponge texture smooth — this final step is what turns “sponge dots” into “seamless gradient.”
That is the entire skill. Every design below runs on these five steps — only the colors and directions change.
Design 1: The Burgundy-to-Gold Classic

Vertical. The season’s signature gradient — deep burgundy at the cuticle melting into liquid gold at the tips.
The pairing mirrors every Christmas candle: wine-dark depth ending in warm light. Wear it beside the gold jewelry and the burgundy outfits, and the manicure ties the whole December wardrobe together. The build runs the five-step sponge method with our classy red nails guide’s deepest wine as the base.
Design 2: The Plum-to-Silver Fade

Vertical. Plum dissolving into icy silver — the cool-undertone gradient that reads frost at the tips.
The pairing pulls from two trends at once: the plum from our christmas plum nail trend 2026 report melting into the silver shine of the season. Cool-toned wearers — this gradient was built for your undertone.
Design 3: The Chocolate-to-Cream Soften

Vertical. Espresso fading into warm cream — the gradient that reads like milk poured into cocoa. The softest, most wearable gradient of the ten, and the one that pairs with every outfit without competing.
The chocolate side borrows the shade from our chocolate nails report — the gradient version of the season’s it-shade.
Design 4: The Emerald-to-Gold Royal

Vertical. Forest green melting into metallic gold — the Christmas gradient that reads like a wrapped gift. The most explicitly festive design in the guide, and the one that pairs with the green-and-gold tablescape of every classic December room.
The shade note: keep the emerald deep — bright green gradients read spring. The jewel depth is what keeps this design seasonal.
Design 5: The Reverse Red-to-Black

Reverse direction. Cherry red at the cuticle deepening into black at the tips — the dramatic gradient that reads vampy and party-ready.
The reverse advantage: dark tips hide every chip and wear mark — this gradient stays fresh-looking longer than any light-tip version. The baddie-leaning build from our fall nail ideas 2026 collection, dressed for December.
Design 6: The Diagonal Champagne-to-Rose
Diagonal. Champagne sweeping to rose gold corner to corner — the softest, most modern gradient of the set.
The diagonal effect: the asymmetric sweep adds motion to every hand gesture, and the two metallics catch light differently — champagne glows, rose reflects. The double-metal finish reads like mixed jewelry.
Design 7: The Navy-to-Ice Winter
Vertical. Midnight blue dissolving into icy pale blue — the gradient that reads like the first frost. The winter-wonderland build for anyone whose Christmas is white, and the design that pairs with silver like it was invented for it.
The tone trap to skip: keep both blues cool-toned. A warm navy into a warm ice reads muddy — the cold family together stays crisp.
Design 8: The Glitter-Tip Ombré

Vertical. Any deep shade — burgundy, plum, forest — with glitter building from nothing at the cuticle to full sparkle at the tip. The gradient that fades into celebration.
The sponge upgrade: tap fine glitter polish with the same sponge method — three taps per nail builds the density gradually. The build that carries the look from office to party without a change, echoing the transition logic in our thanksgiving glitter nails guide.
Design 9: The Nude-to-Cherry Whisper
Vertical. Warm nude at the cuticle into cherry red at the tips — the subtlest gradient of the ten, and the office-safe one. The fade reads like natural coloring turned up one notch — the design for the tables where quiet wins.
The workplace pick: this gradient survives every dress code and every family opinion — the safe-but-stunning entry into the trend.
Design 10: The Charcoal-to-Silver Smoke
Reverse direction. Charcoal gray at the tips deepening into near-black at the cuticle — wait, reverse that: black at the cuticle, silver smoke rising to the tips. The moody gradient that reads like frost on slate — the design for the modern Christmas and the person who skipped red again this year.
The smoke pairing: silver chrome powder tapped over the silver end adds the mirror — the gradient-plus-chrome hybrid for maximum December shine.
Ombré by Nail Shape — The Direction Match
The same gradient wears differently per shape — two pairings matter most.
Almond and coffin: vertical gradients elongate these shapes further — the fade draws the eye cuticle-to-tip and doubles the taper’s lengthening effect. The plum-to-silver and navy-to-ice live here.
Square and squoval: diagonal gradients shine on flat surfaces — the corner-to-corner sweep reads crispest on square edges. The champagne-to-rose diagonal is this shape’s signature.
Short nails: keep gradients to two close shades — burgundy-to-gold and nude-to-cherry work at short lengths, while high-contrast fades overwhelm small canvases. The proportion rules from our short nail designs 2026 guide apply to gradients exactly.
The Mistakes That Muddy Every Gradient
Three errors cause every failed ombré — all one-fix repairs.
The dry sponge. A dry sponge paints streaks instead of blending. Damp it, wring it, then load the polish — the moisture is what merges the colors.
Skipping the edge cleanup. Ombré spreads polish onto skin by nature — the alcohol-swab cleanup after, and before the topcoat, is what separates salon-looking from homemade. Clean first, topcoat second.
Thick base coats. The base layer needs to dry completely before sponging — a wet base mixes with the sponge color and turns the gradient into mud. Patience between layers is the whole game.
For gradients that last the full three-week holiday marathon, the gel sponge method works identically — the system education in our gel nail designs 2026 guide covers it, and the removal in our how to remove gel polish guide keeps January’s nails undamaged.
Christmas Ombré Nails FAQ
How do I do ombré nails at home for Christmas?
The sponge method: base color dried fully, second color painted in a stripe on a damp makeup sponge, pressed onto the nail tip in repeated taps, edges cleaned with a remover swab, and topcoat applied while fresh. Five steps, one kitchen sponge, and every gradient in this guide builds the same way.
What color ombré is best for Christmas?
Burgundy-to-gold is the season’s signature — wine depth into warm light. Plum-to-silver suits cool undertones, chocolate-to-cream is the softest wearable version, and emerald-to-gold is the most explicitly festive. Pick by your undertone and your outfit palette.
Do ombré nails last longer than solid polish?
Yes — the gradient’s transition hides regrowth and tip wear that solid colors announce. A solid red shows a gap in ten days; a burgundy-to-gold gradient hides wear for two to three weeks, especially in the reverse direction with dark tips.
What nail shape wears ombré gradients best?
Almond and coffin elongate further with vertical fades, square and squoval nails show diagonal sweeps crispest, and short nails carry two-close-shade gradients best — burgundy-gold and nude-cherry — while high-contrast fades overwhelm small canvases.
Is ombré better in gel or regular polish?
Both work — the sponge technique is identical. Regular polish holds seven to ten days for the holiday weekend; gel ombré holds two to three weeks and covers every December event in one set. For the full marathon, the gel route earns its extra effort.
More questions? Ask us on Facebook and we will match a gradient to your shape and your shade season.

Two Shades Are Better Than One
Ten gradients, four directions, and the five-step sponge method that builds them all — christmas ombré nails are the season’s rare design that looks harder than it is and lasts longer than it should.
Pick your direction tonight. Load the sponge this weekend. And when the holiday photos come back, the gradient will be the detail that made every frame look professionally styled.
Save this guide to our Pinterest boards so it is on your phone when you paint, and complete the December shelf with the plum nails trend report, the chocolate nails report, and the full Christmas nails 2026 collection.
New gradient guides every week this season. Stay blended, stay merry!

Alexander Smith is an accomplished blogger with years of experience in crafting engaging and insightful content. Known for his expertise and passion for storytelling, Alexander brings a unique perspective to Fascinate Names, captivating readers with his thoughtful analysis and fresh ideas. His extensive background in digital media and writing makes him a valuable voice in the blogging community.